Kulya 4.0 {battery}

HEXAPOD Kulya 4.0
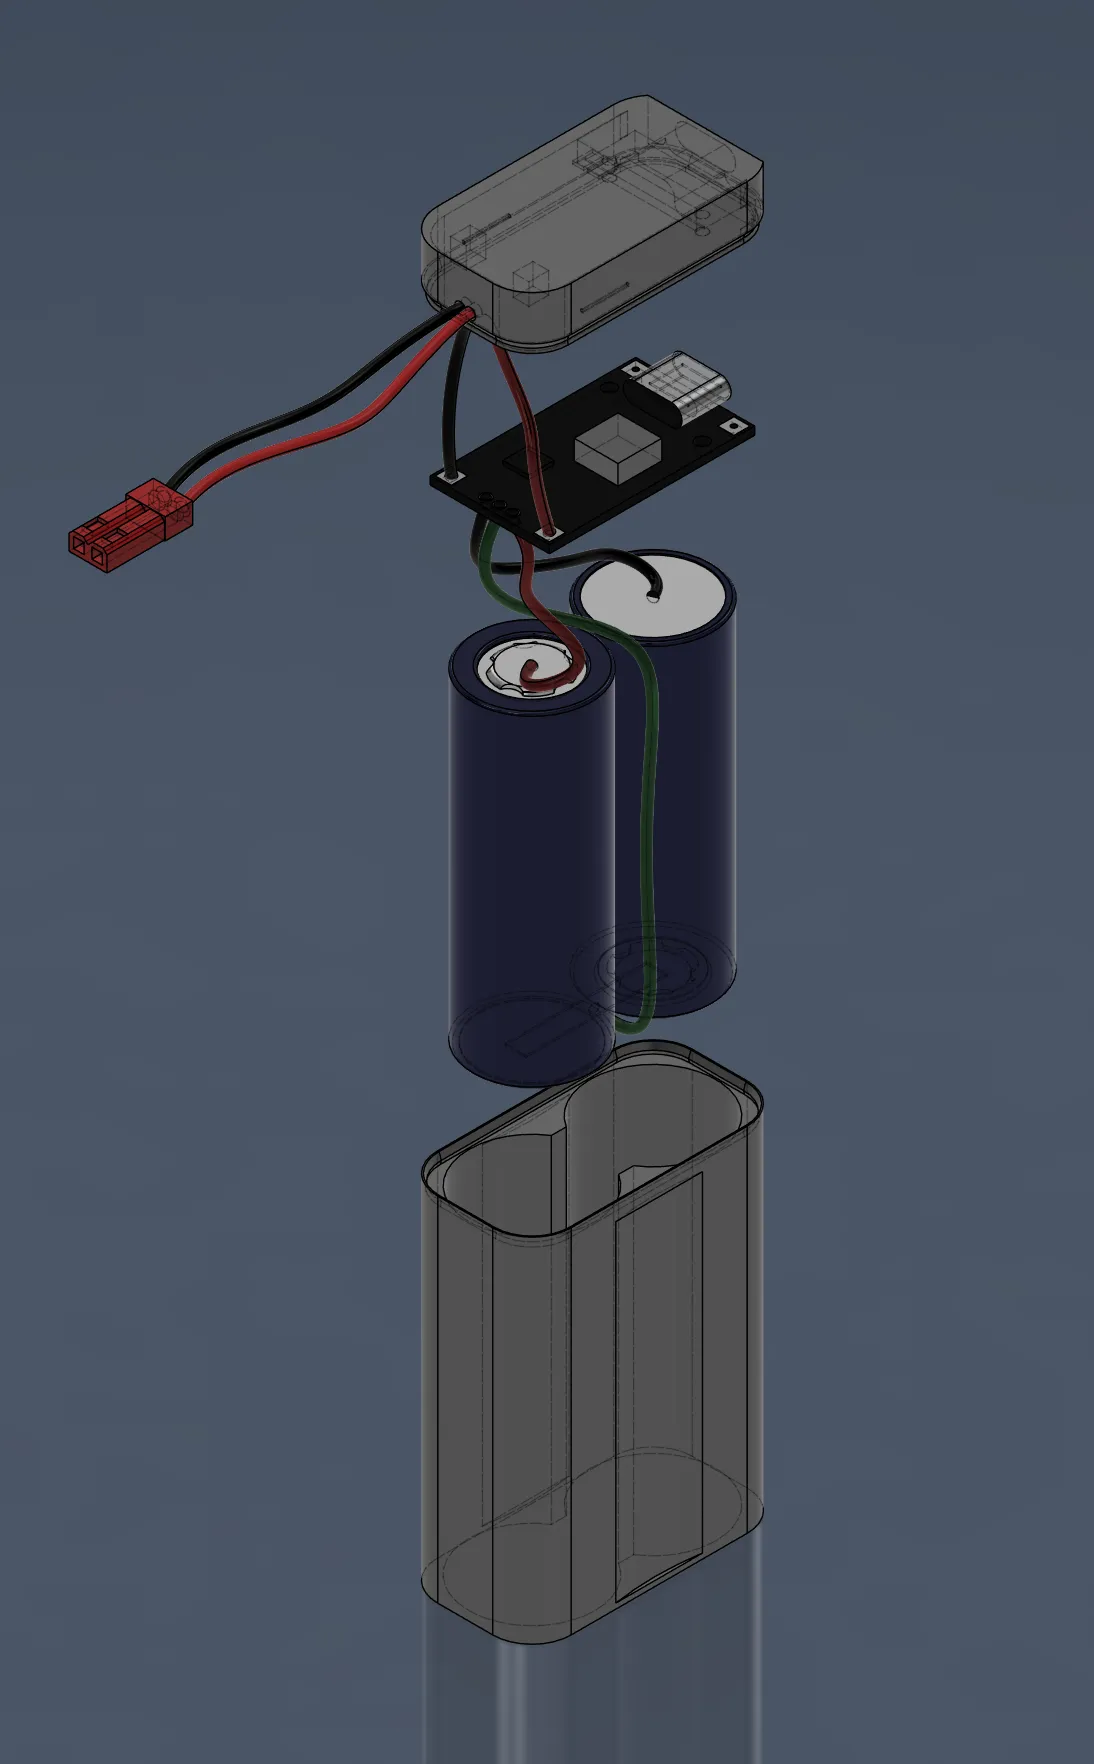
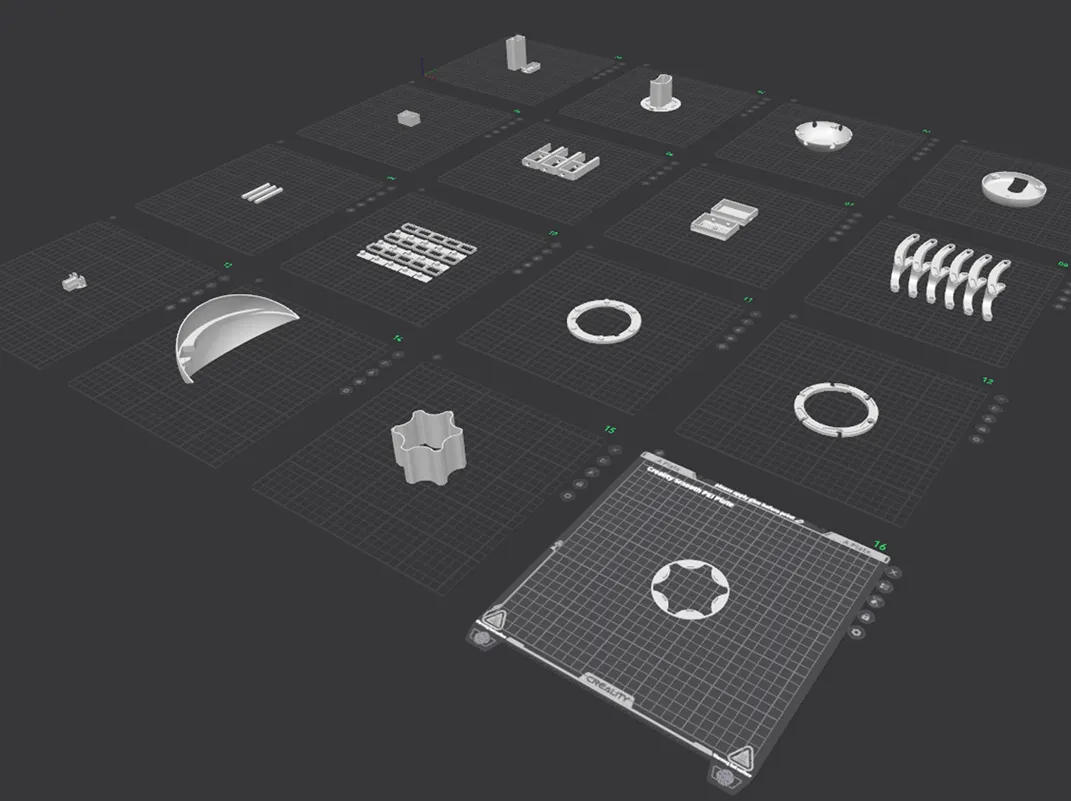
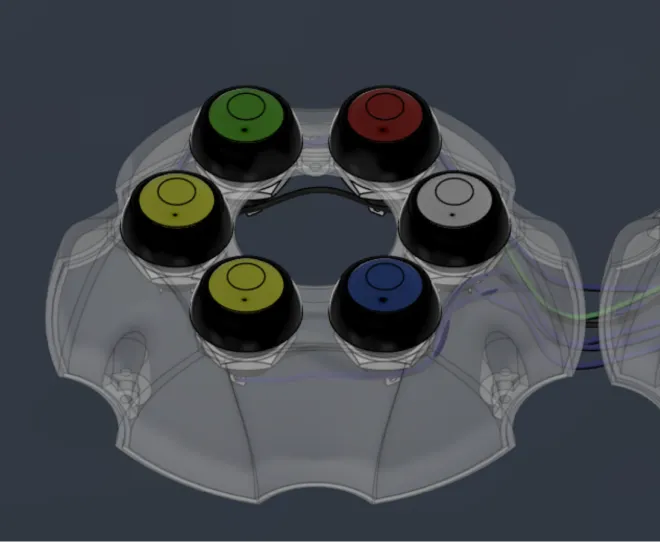
The robot becomes mobile when it receives its own power source. In this DIY, we will assemble a lithium-ion battery module with a BMS — a system for balancing and protection. 
A battery is a separate engineering system that requires precision and responsibility, so do not neglect safety rules.
0
people already downloaded this DIY
Keeping It Safe

⚠️ Safety and Responsible Use

Working with batteries requires special attention and strict adherence to safety rules. This DIY involves power sources that can be hazardous if connected incorrectly, damaged, or used outside recommended conditions.

The recommended age for independent work with batteries is 14 years and older.

For younger participants, all battery-related steps must be performed under continuous adult or instructor supervision.

Before starting, carefully review the instructions, observe correct polarity, avoid using damaged batteries, and never leave the system unattended during testing.
Step 1

Getting to Know the Power Components

The battery consists of three main parts:
- two lithium-ion cells; 
- BMS-module for charging and balancing; 
- a power connector used to connect the battery to the robot.

The 3D-printed enclosure must be printed according to the specifications provided in the files.

⚠️ Important: Li-ion cells are always live. Incorrect wiring, short circuits, or overheating can cause fire or serious damage to the components.

Battery assembly should only be performed by someone with basic soldering experience and strict adherence to safety procedures. Before you begin, make sure your workspace is properly prepared and follow each step carefully and in sequence.
Step 2

Preparing the Power Connector

Connecting power to the battery module. 

Route the power connector wires through the openings in the plastic battery cover. 

Make sure the wires are long enough for convenient connection.

Carefully solder the wires to the power module according to the
picture 1. Power Connector
Always observe polarity: connect the positive wire to “+” and the negative wire to “–”. A mistake at this stage can damage the electronics.
Step 4

Preparing the Battery Cells

Before connecting the cells, verify their specifications. 

Make sure both Li-ion cells have the same voltage and capacity. Using mismatched cells may lead to improper operation or damage to the battery pack. It is recommended to use cells with pre-welded tabs. If they are not available, you will need a spot welder and nickel strips for safe connections. Connect the cells strictly according to the wiring diagram.

During assembly, avoid short-circuiting the terminals and prevent the cells from overheating.
Step 5

Completing the Battery Connections

During this stage completes the electrical connections between the cells and the module. 

Solder the negative, middle, and positive wires to the appropriate cell terminals according to the wiring diagram. Make sure the wires are secured and not loose, as movement may cause a short circuit. Insulate any exposed contacts with insulating tape. 

It is recommended to solder one wire at a time to reduce the risk of mistakes or accidental short circuits.
Step 6

Final Assembly

At the final stage, assemble the battery module inside the case. 

Place the cells inside the case carefully. Do not apply pressure to the cells and avoid bending the wires. Ensure all connections remain properly positioned. 

Add a layer of insulating tape between the BMS module and the top of the battery cells to provide additional protection against accidental contact. 

Close the case cover and secure it firmly. If necessary, you may additionally seal the joint to ensure the enclosure remains tightly closed.

The battery is assembled!

The battery is assembled. Autonomous power is ready.
Now — it’s time to take control into your own hands.

Other diy-kits

HEXAPOD Kulya 4.0
7124

kulya 4.0 {body}

This block contains .stl files and video instructions for assembling the robot body. It describes the sequence of mechanical steps from printing the parts to a fully assembled body.
Open diy
HEXAPOD Kulya 4.0
7124

kulya 4.0 {controller}

This block contains files and instructions for assembling and configuring the controller for the KULYA 4.0 robot. It covers electronic component connections, basic control logic, and controller functionality testing.
Open diy